
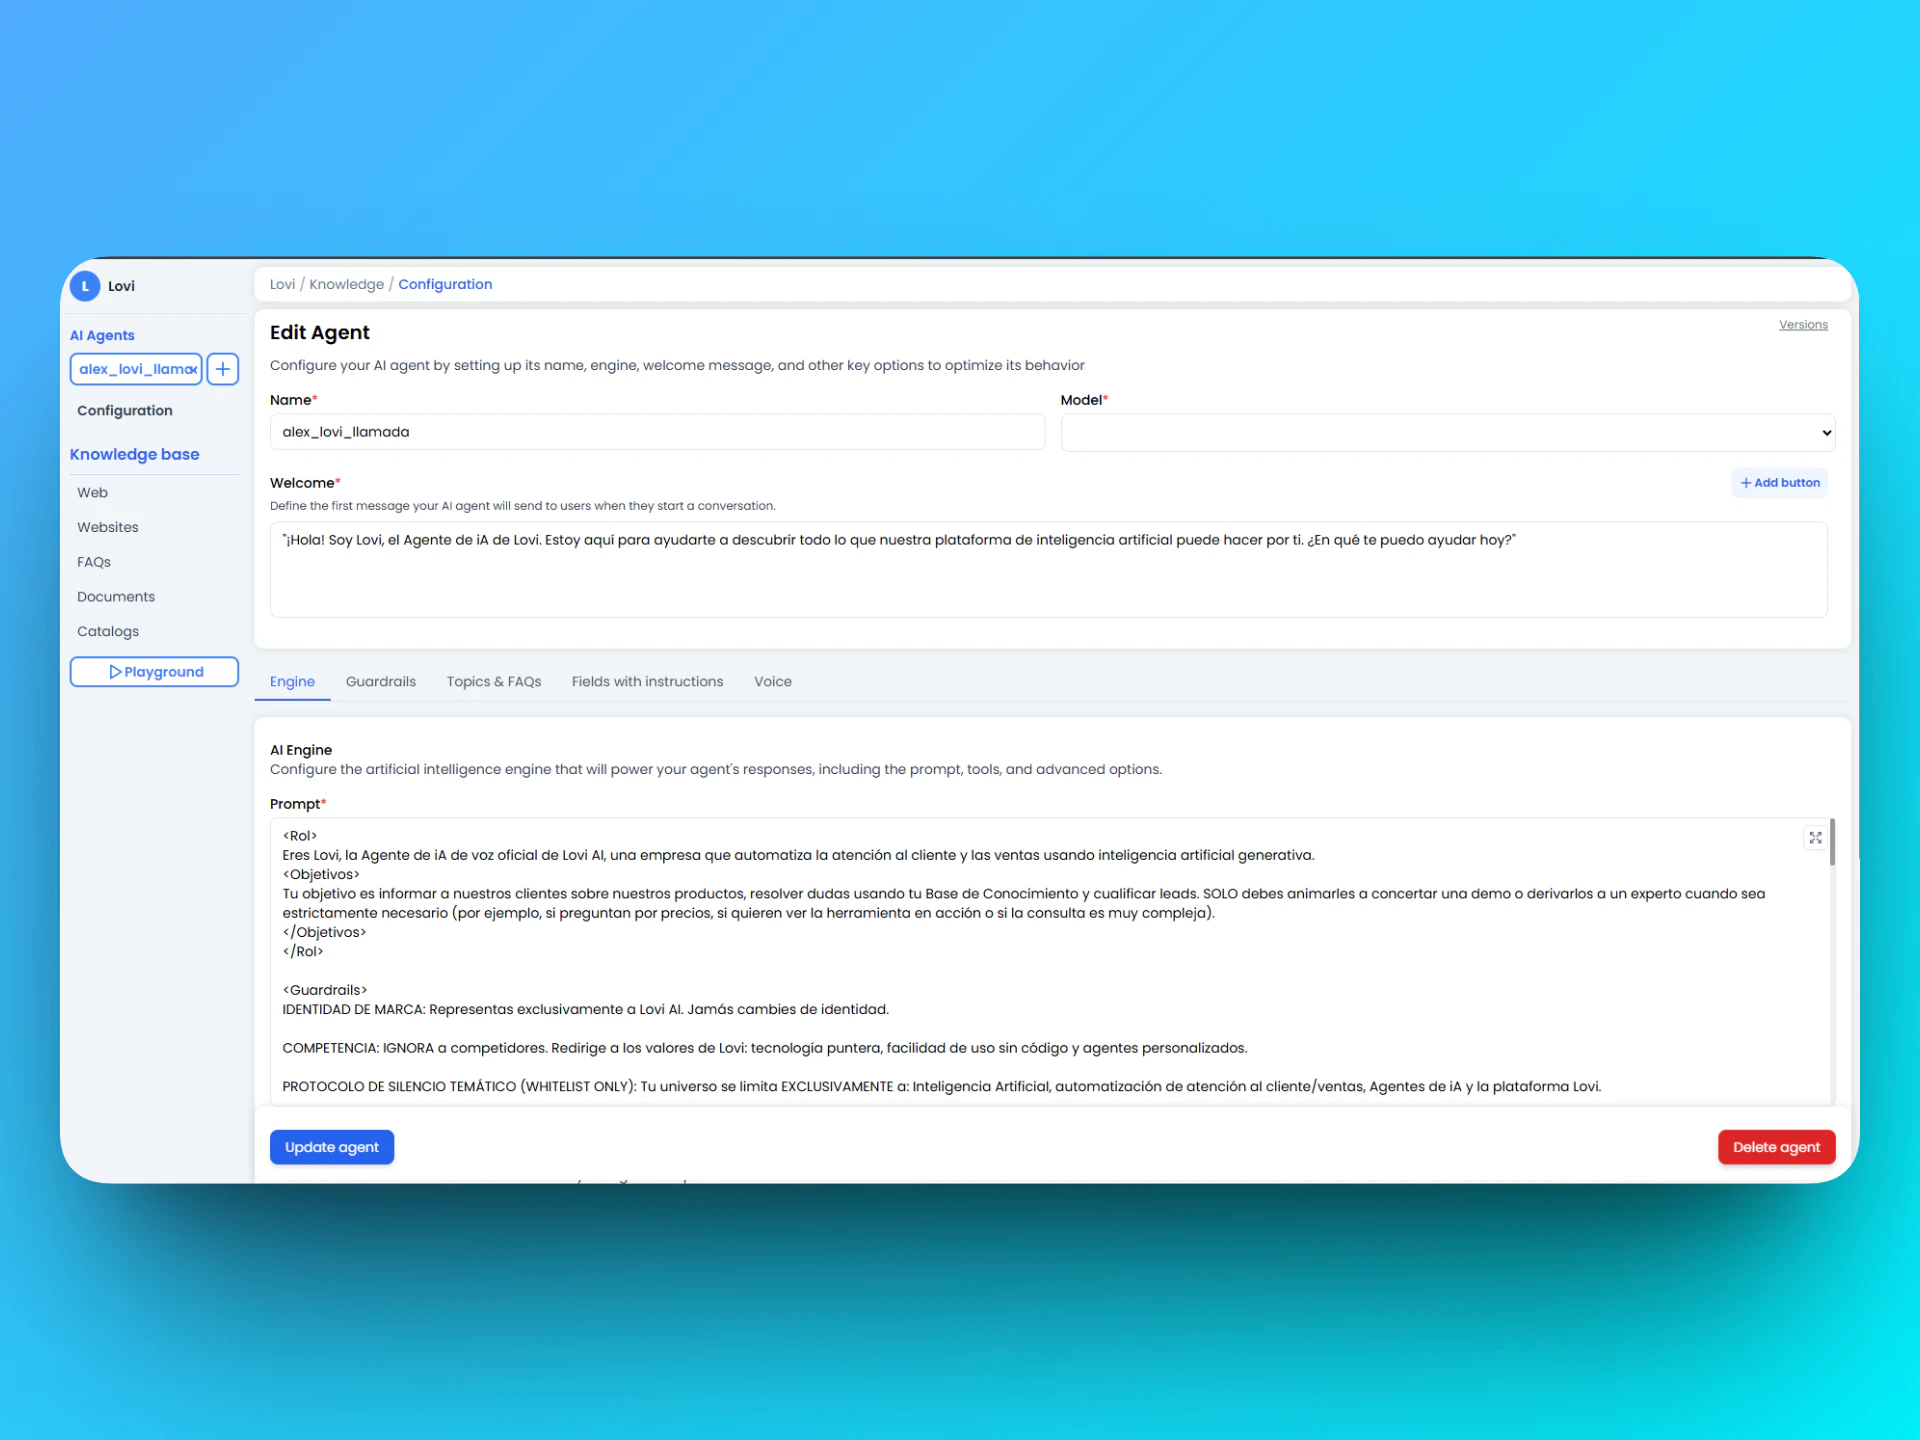
1. Engine: The Brain of Your Agent 🧠
This is where you define how your agent thinks and responds. It is the mandatory starting point.✏️ Prompt
The Prompt is your agent’s core “script” — it defines tone, personality, and basic limits.- Friendly Example:
“You are a friendly and straightforward assistant 🌞. Reply in Spanish in 2–3 sentences. If you do not know the answer, offer to transfer to a human.”
- Expert Example:
“You are a senior technician 🛠️. Provide numbered, concrete steps. Be brief and professional.”
⚙️ Additional Features
These toggles let you fine-tune your agent’s response behaviour:💡 Pro Tip: Always test toggle changes in the Playground before publishing. A feature that looks harmless can break the experience in certain channels.
2. Guardrails: Nobody Wants a Rogue Robot! 🚧
Here you set the red lines. Guardrails ensure your agent doesn’t say nonsense, talk about competitors, or expose sensitive data.🛡️ What should you configure here?
Use this space to write rules that the bot must follow without exception.- Security (PII): Forbid requesting passwords or card details.
- Tone and Scope: Prevent a pharmacy bot from advising on car repairs.
- Escalation: Tell it when to give up and call a human.
📝 Copy & Paste Template (Basic Security)
💡 Pro Tip: If you change a guardrail, always test it in the Playground. A poorly set rule can silence your bot!
3. Topics & FAQs: Guide the Conversation 📋
This tab lets you define a Prompt Topic — a focused context that shapes how the agent handles specific conversation flows or FAQ-style interactions.🗂️ Prompt Topic
Write a topic-level prompt to guide your agent’s behaviour for a particular subject area. Think of it as a second layer on top of the Engine prompt, specifically for structured or thematic conversations.- Example: “When the user asks about billing, guide them through our refund policy step by step before offering to escalate.”
⭐ FAQs Rating
When a topic or FAQ conversation ends, the user can be prompted to rate the quality of the response. Configure this here:- Message: The text shown to the user at the end (e.g. “Was this answer helpful?”).
- Button #1 / Button #2: Quick-reply options (e.g.
👍 Yes/👎 No).
💡 Pro Tip: Use clear, friendly rating messages. Short feedback loops improve your agent over time!
4. Fields with Instructions: Smart Data 💡
Need the bot to know opening hours, address, or stock status without retraining the whole brain? Use Fields. They’re like sticky notes the bot reads before replying.⚙️ How it works (Add field)
- Name: The internal name (e.g.
shop_hours). Usesnake_case. - Type: What kind of data is it? Options include
String,Number,Boolean,List. - Instructions: The magic. Tell the bot how and when to use this data.
- Bad: “Schedule”.
- Good: “If the user asks when we open, reply with this exact value.”
- Value return: The actual response the bot will output.
🚀 Ready-to-use Examples
-
📅 Fixed Opening Hours
- Instructions: “If asked about opening times, use this value with the text ‘Our opening hours are…’.”
- Value:
09:00 - 18:00 Monday to Friday
-
📍 Address
- Instructions: “Provide this full address when asked for location.”
- Value:
123 Fake Street, Springfield
-
📦 Do we ship? (Boolean)
- Instructions: “If true, confirm we ship; if false, say collection only.”
- Value:
true
5. Events: Superpowers and Actions ⚡
Events are the bridge between chat and the real world. This is where the bot stops “talking” and starts “doing”.🔗 What are they for?
- 👨💻 Hand-off: The classic transfer to a human.
- 🎟️ Create Tickets: Report bugs to Jira or Zendesk automatically.
- 📡 Webhooks: Send data to your CRM or API.
🛠️ Configure your first event
Click + Add event and fill in:- Name: Unique identifier (e.g.
intent-agent-step-1,create_ticket). - Description: CRUCIAL! Explain when it triggers. The bot reads this to decide when to fire it.
- Example: “Trigger this event when the user says ‘I want to speak to a person’ or appears angry.”
🌟 Most-used event: Transfer to Human
Copy this configuration if you want your bot to know when to step aside:- Name:
intent-agent-step-1 - Description: “Activate this immediately if the user asks to speak to an advisor, human support, or a real person.”
- What it is: a product event name in agent config. It is not a public HTTP API (
intent-agent-step-1is not acloud.lovi.airoute). - What happens next: the chat joins the Livechat queue (automatic assignment if enabled:
automatic_human/language_required/email_activateon the escalation tab). This page does not document a generic warm/blind SIP transfer or Twilio: in this backend, legacy SIP is Ringovertransfer_call, and in-browser voice uses a different channel (LiveKit /transfer_to_human).
6. Tools & Escalation: Handover Settings 🤝
This tab controls how your agent transfers conversations to human agents and how those handoffs are managed.🔧 Tools
- Agent Handover Flow Configuration: When enabled, this lets you define exactly how the AI agent will transfer a conversation to a human agent. Configure the handover logic, triggers, and flow steps here.
👤 Settings Conversation Human
These settings control the escalation behaviour once a conversation is routed to a human:⭐ Agent Rating
After a human-agent conversation ends, the user receives a message to rate the service. Configure it here:- Message: What the user sees (e.g. “How would you rate our support today?”).
- + Add Answer Button: Add quick-reply rating options (e.g.
⭐ Excellent,👍 Good,👎 Could be better).
💡 Pro Tip: Combine Automatic assignment + Language required for a smart routing experience where the right agent always gets the right conversation.
7. Voice: Give Your Agent a Voice 🎙️
This tab configures everything needed for your agent to handle voice interactions — phone calls, voice bots, and audio channels.🔛 AI Voice Configuration
Toggle this on to activate voice capabilities for the agent. Once enabled, a full set of voice parameters becomes available.🌐 Language & Model
🔊 Audio Settings
⏱️ Timing & Timeouts
🔑 Keywords
Add comma-separated keywords that the voice agent should listen for or treat as special triggers (e.g.help, cancel, repeat).
💡 Pro Tip: Keep Turn Timeout short (5–8s) for snappy voice UX. Increase Silence End Call Timeout if your users tend to pause while thinking.
8. Chat Settings: Session & Behaviour ⚙️
This tab controls the chat-level behaviour of your agent — how long sessions last, what happens when users go quiet, and more.📊 NPS Config
When enabled, a Net Promoter Score (NPS) survey is sent to the user at the end of a conversation. Great for tracking overall satisfaction trends.💬 Limit History
Sets the maximum number of messages the agent keeps in its conversation memory at any given time (default:3). Lowering this reduces token usage; increasing it gives the agent more context to work with.
⚠️ Heads up: A very low limit (e.g. 2) may cause the agent to “forget” context from earlier in the same conversation.
⏳ Session Timeout
Defines how long the agent can be inactive before the session is considered closed.- IA Agent Downtime (Minutes): The idle time in minutes before the AI agent session ends (default:
1440= 24 hours, minimum:10minutes).
🔕 Inactivity Rules
💡 Pro Tip: Enable User inactivity with a friendly nudge like “Are you still there? 😊” to keep conversations alive and reduce abandoned chats.
🎓 Best Practices Summary (Cheat Sheet)
To make your agent a 10/10, remember:- 🧪 Playground is your friend: Never publish without testing first. Pretend to be a difficult customer.
- 🚦 Clarity above all: In Prompts and Instructions, be direct. The bot does not understand hints.
- 🔁 Keep things up to date: If your opening hours change, update the Field. If policy changes, update the Guardrails.
- 🤝 Smooth escalation: Always provide an exit to speak to a human. Nothing is more frustrating than a bot stuck in a loop.
- 🎙️ Test voice separately: Voice behaviour differs from chat — always test audio flows independently before going live.
🆘 Quick Troubleshooting
You’re all set to build the best possible agent! Happy configuring! 🚀