
Step 1: The Basics (Basic Information)
First, let’s identify what we’re about to create.-
Name of the template: Give it an internal name. Your customer won’t see it, but you will.
- Bad:
template_1_final_final_definitive - Good:
summer_promo_2024orpayment_receipt.
- Bad:
-
Category: Meta is very strict here. Don’t lie!
- 📢 Marketing: If you’re selling something, offering discounts, or recovering abandoned carts.
- 🧾 Utility: If you’re sending a receipt, an order status update, or a security alert.
- Language: The language of the message.
Step 2: The Content (Message Content) ✍️
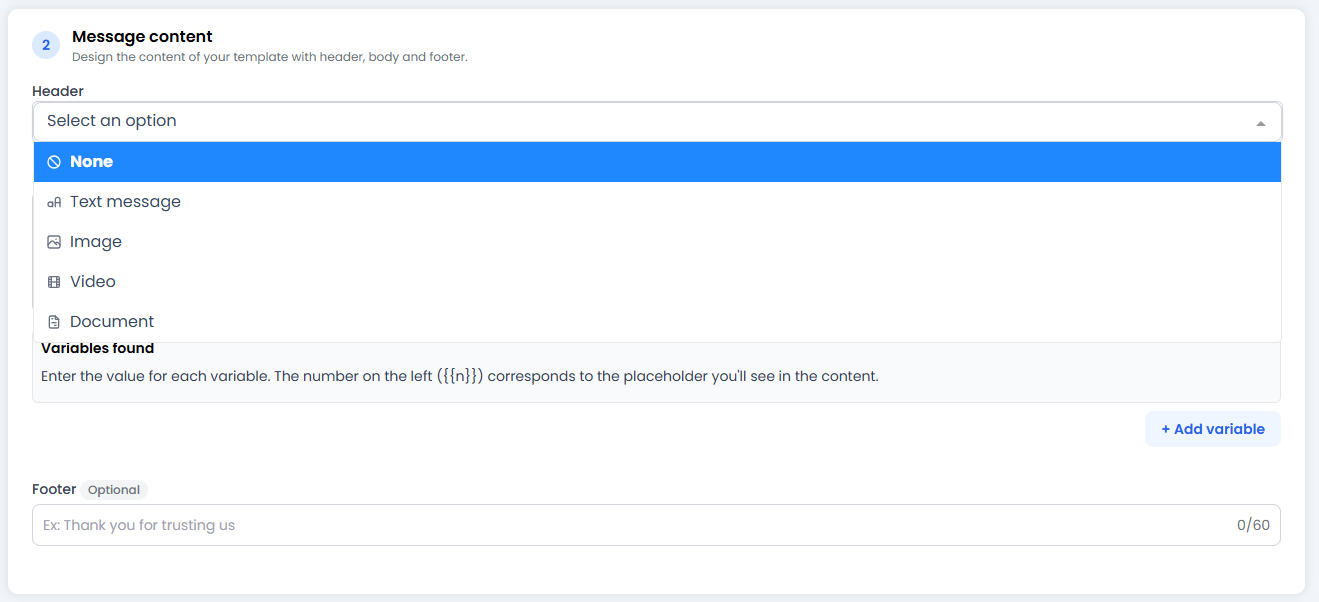
A. Header (Optional – The Header)
The first thing the user sees. It can be:- Text: A bold title.
- Media: An Image 📸 (highly recommended for Marketing), a Video, or a Document (ideal for sending invoice PDFs).
B. Message Body (The Body)
The main text. This is where we use the magic of variables ✨. Don’t write “Hello John”. Write “Hello{{name}}”.
- Variables such as
{{1}},{{name}}, or{{price}}are placeholders that will be automatically filled with data from your database when the message is sent. That way, each customer feels like you’re speaking directly to them.
C. Footer (Optional – The Footer)
A small, grey text at the end. Use it for signatures or legal disclaimers.- e.g.: “Sent by Lovi AI” or “Thank you for your trust”.
Step 3: The Buttons 🔘
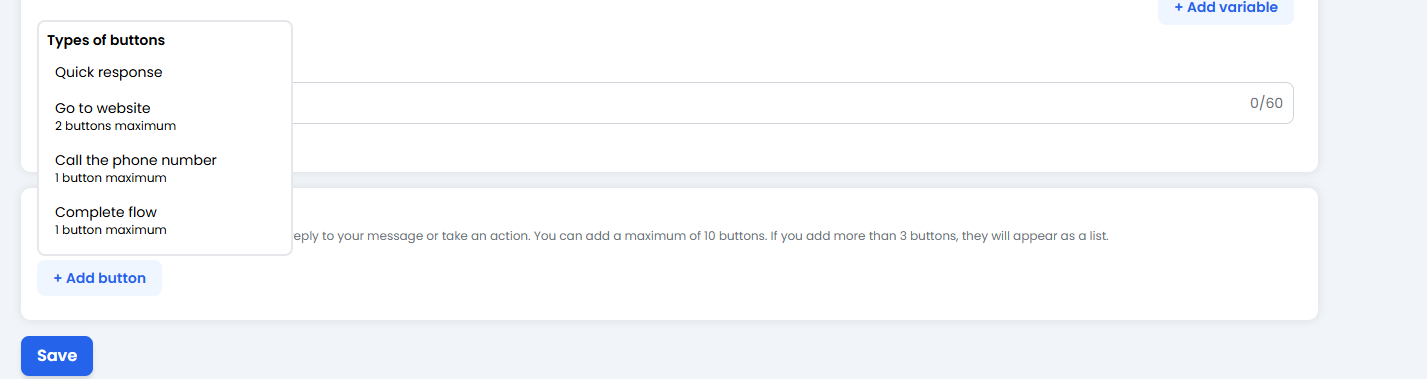
- 🚀 Quick Response: Simple text (e.g. “Yes, I’m interested”, “No thanks”). The user taps and sends the response.
- 🌐 Go to website: Opens your website (maximum 2 buttons of this type).
- 📞 Call phone number: Opens the phone dialler so the user can call you (maximum 1 button).
- ⚡ Complete flow: For advanced use cases, such as opening a form inside WhatsApp (maximum 1 button).
The rule of 10: You can mix button types, but the total number cannot exceed 10.
🚀 Send for Approval!
When you click Save:- Your template is saved in Lovi.
- It is automatically sent to Meta’s servers.
-
We wait for the verdict. ⚖️
- If you respected the category and didn’t behave like a spammer, it will be approved within minutes (or a couple of hours).
- You’ll be able to see the status in the Templates tab (Module 13).