> ## Documentation Index
> Fetch the complete documentation index at: https://docs.lovi.ai/llms.txt
> Use this file to discover all available pages before exploring further.
# RingOver
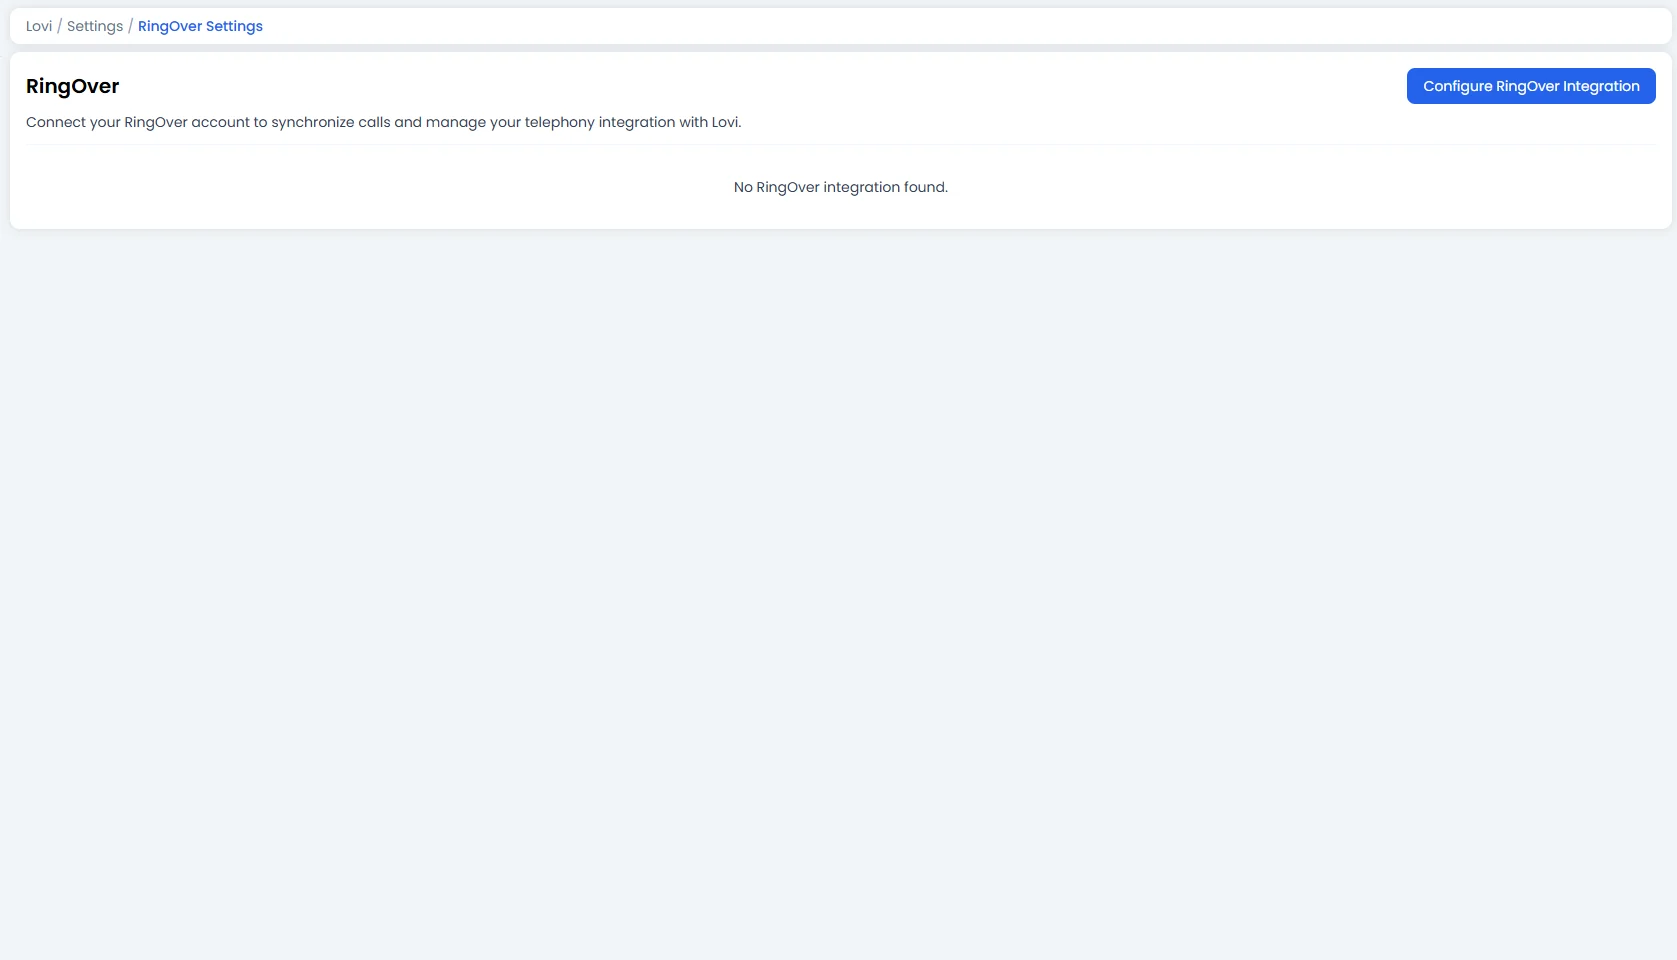
> Connect your RingOver account to synchronize calls and manage your telephony integration with Lovi.
 If your team handles calls through RingOver, this integration brings those telephony superpowers straight into Lovi. **Connect your RingOver account, link your webhooks, and keep every call in sync.**
At its core, this module lets you validate your RingOver credentials, manage the integration status, and configure webhooks so your switchboard and Lovi speak the same language.
***
### 🔗 1. Connecting Your RingOver Account
To get started, click the blue button:
**\[Configure RingOver Integration]**
This opens a setup wizard that walks you through the process in one simple step:
#### Step 1: Enter your API Token 🔑
If your team handles calls through RingOver, this integration brings those telephony superpowers straight into Lovi. **Connect your RingOver account, link your webhooks, and keep every call in sync.**
At its core, this module lets you validate your RingOver credentials, manage the integration status, and configure webhooks so your switchboard and Lovi speak the same language.
***
### 🔗 1. Connecting Your RingOver Account
To get started, click the blue button:
**\[Configure RingOver Integration]**
This opens a setup wizard that walks you through the process in one simple step:
#### Step 1: Enter your API Token 🔑
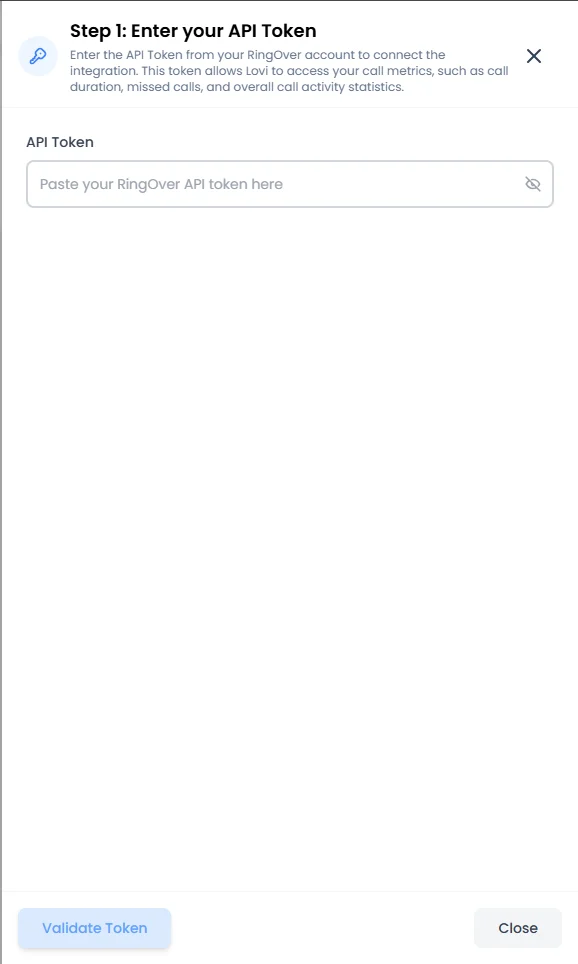 * **API Token:** Paste the API Token from your RingOver account. This token allows Lovi to access your call metrics, such as call duration, missed calls, and overall call activity statistics.
* **Validate Token:** Click the **Validate Token** button at the bottom. The system will verify your credentials against RingOver's servers.
If the token is valid, your integration account will be created automatically. If it fails, double-check that you've copied the token correctly (no extra spaces!) and that it hasn't expired in your RingOver dashboard.
***
### 📋 2. Integration Overview (Your Dashboard)
Once your account is connected, you'll see a summary table right on the settings page:
* **API Token:** Paste the API Token from your RingOver account. This token allows Lovi to access your call metrics, such as call duration, missed calls, and overall call activity statistics.
* **Validate Token:** Click the **Validate Token** button at the bottom. The system will verify your credentials against RingOver's servers.
If the token is valid, your integration account will be created automatically. If it fails, double-check that you've copied the token correctly (no extra spaces!) and that it hasn't expired in your RingOver dashboard.
***
### 📋 2. Integration Overview (Your Dashboard)
Once your account is connected, you'll see a summary table right on the settings page:
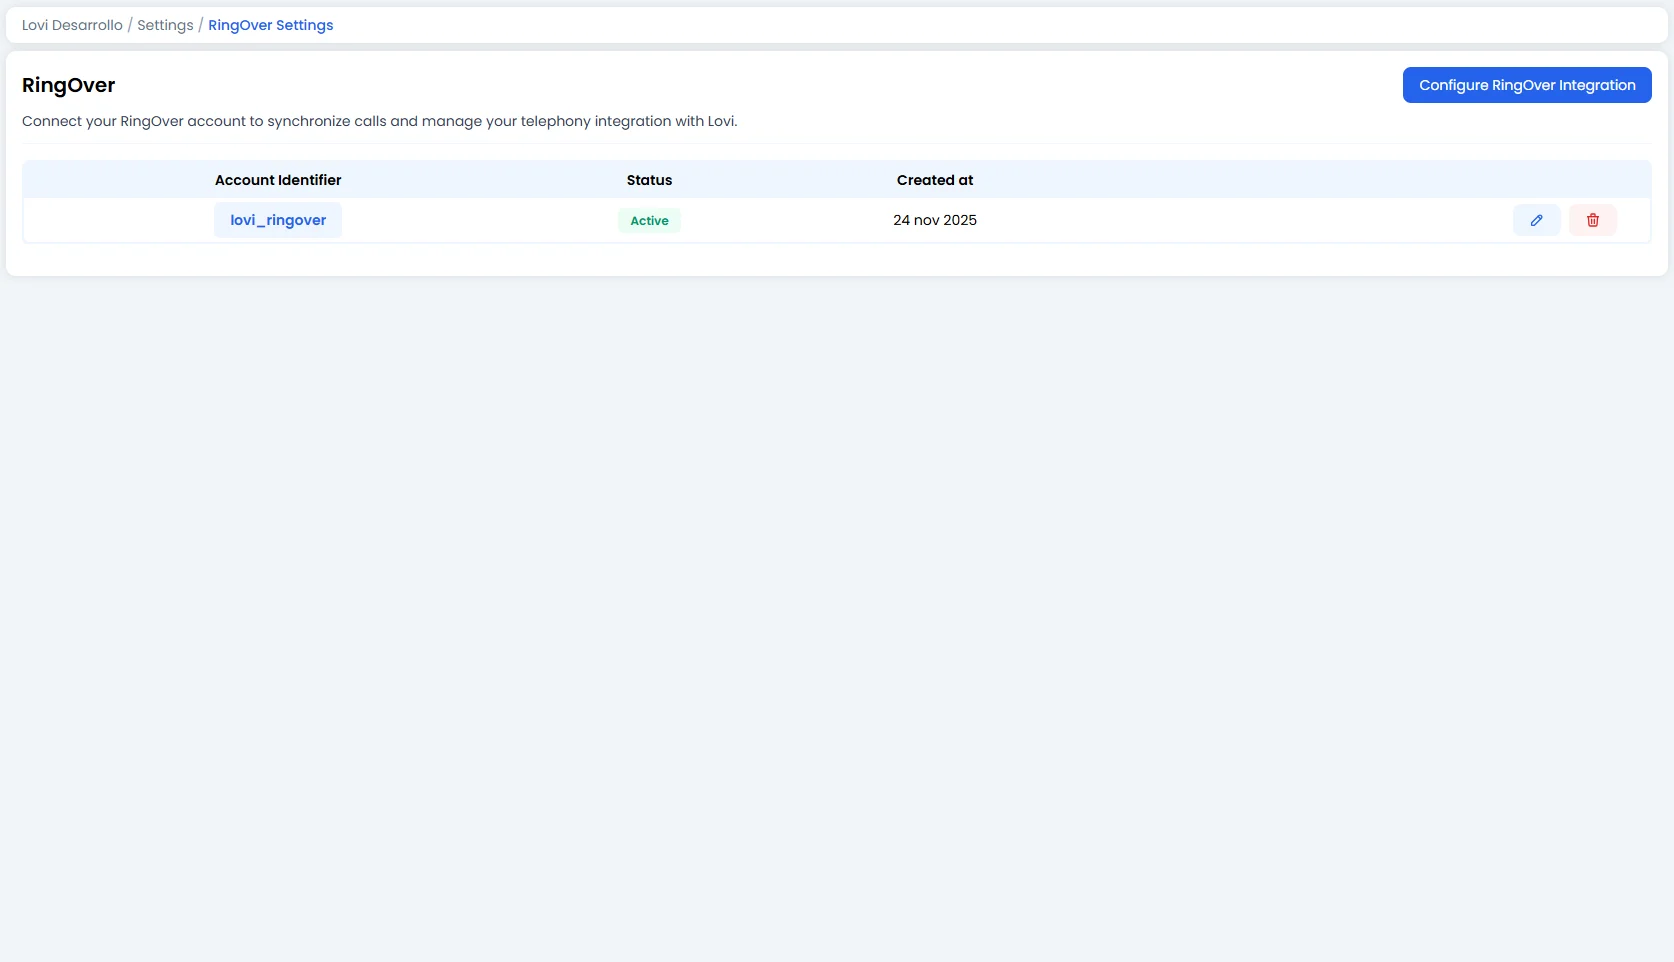 | Column | What it tells you |
| :--------------------- | :----------------------------------------------------------------------------------------------------- |
| **Account Identifier** | The name of your linked RingOver account (e.g. `lovi_ringover`). |
| **Status** | Whether the integration is **Active** or inactive. A green badge means everything is running smoothly. |
| **Created at** | The date when the integration was first set up. |
On the right side of each row, you'll find two action icons:
* **✏️ Edit:** Opens the integration configuration panel.
* **🗑️ Delete:** Removes the integration entirely. Use with caution — this will disconnect your RingOver account from Lovi.
***
### 🛠️ 3. Editing the Integration
Click the **Edit** icon to open the configuration panel:
| Column | What it tells you |
| :--------------------- | :----------------------------------------------------------------------------------------------------- |
| **Account Identifier** | The name of your linked RingOver account (e.g. `lovi_ringover`). |
| **Status** | Whether the integration is **Active** or inactive. A green badge means everything is running smoothly. |
| **Created at** | The date when the integration was first set up. |
On the right side of each row, you'll find two action icons:
* **✏️ Edit:** Opens the integration configuration panel.
* **🗑️ Delete:** Removes the integration entirely. Use with caution — this will disconnect your RingOver account from Lovi.
***
### 🛠️ 3. Editing the Integration
Click the **Edit** icon to open the configuration panel:
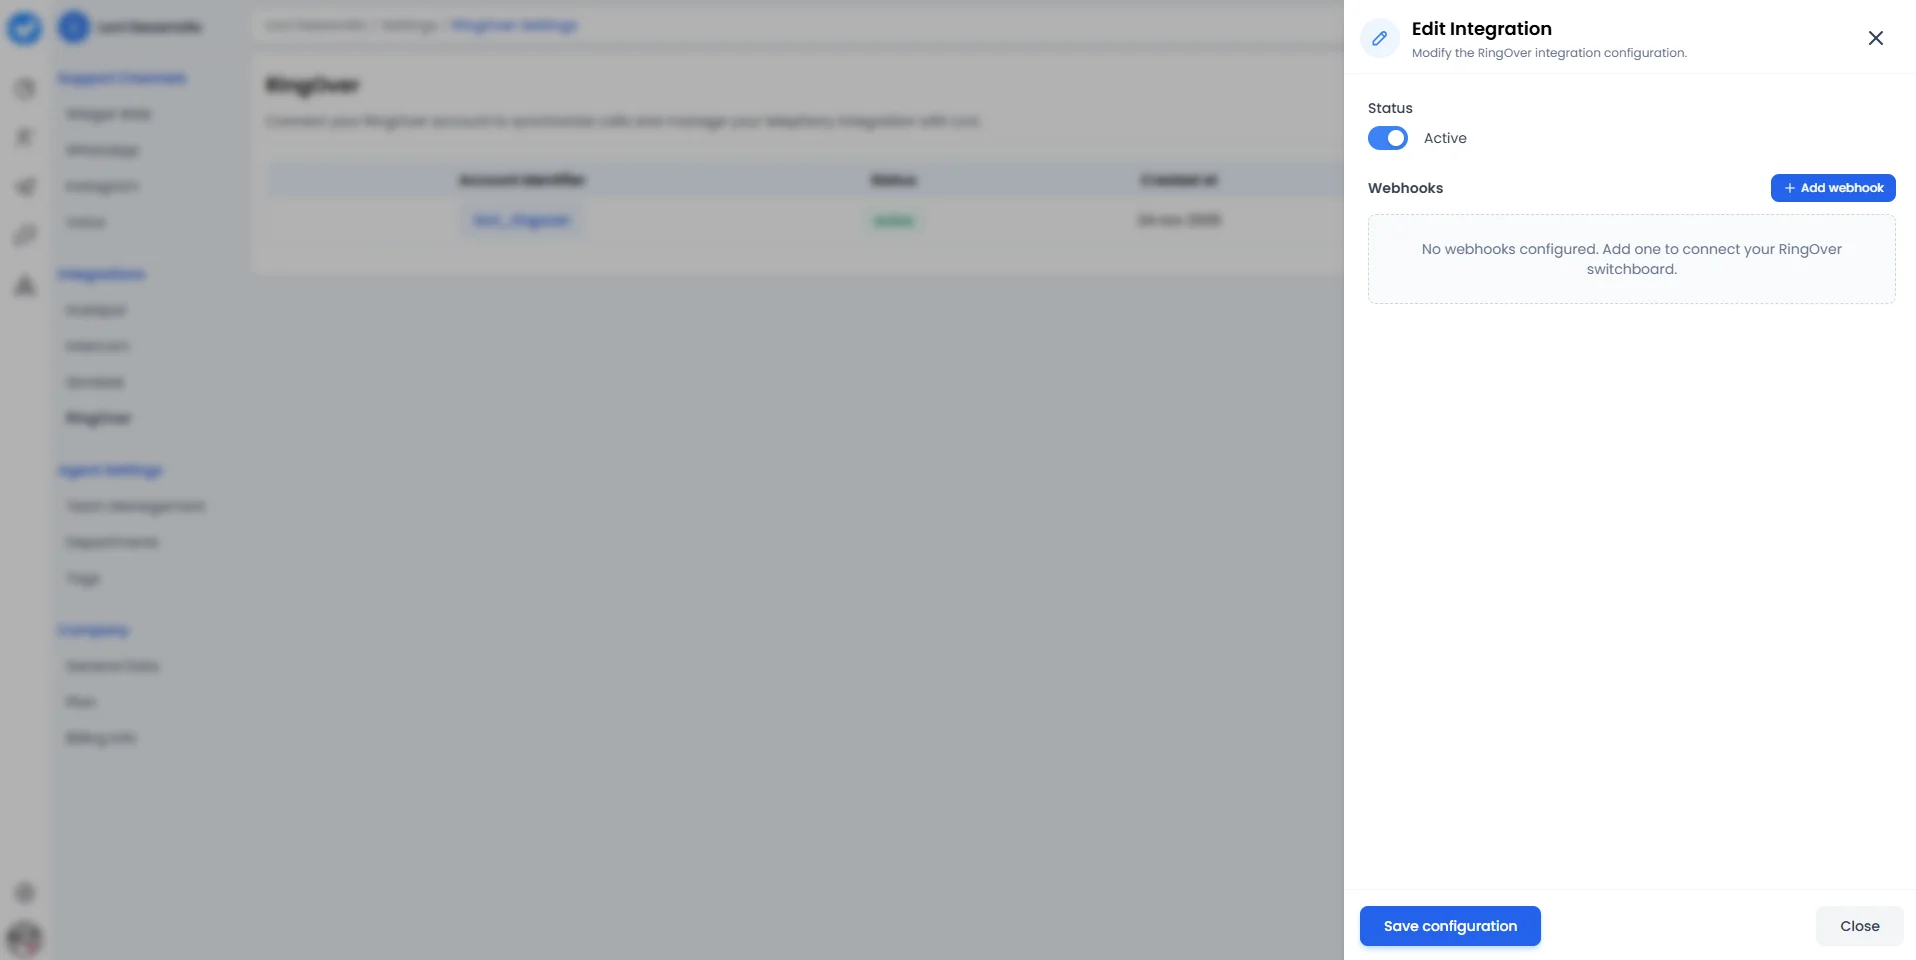 Here you can fine-tune two key aspects:
#### A. Status Toggle 🔄
* **Active / Inactive:** Use the toggle to enable or disable the integration without deleting it. Handy if you need to pause the connection temporarily (e.g. during maintenance or testing) without losing your configuration.
#### B. Webhooks ➕
This is where the real power lives. Webhooks let RingOver notify Lovi in real time whenever something happens on your switchboard.
* **+ Add webhook:** Click this button to register a new webhook.
* **No webhooks configured?** You'll see a friendly message: *"No webhooks configured. Add one to connect your RingOver switchboard."*
Add as many webhooks as you need to cover different event types or switchboard configurations.
Once you've made your changes, click **Save configuration** to apply them.
***
### 🎯 Why connect RingOver?
The main goal is **visibility and automation**:
* **Unified call tracking:** Every call handled through RingOver is synchronised with Lovi, giving you a single pane of glass for all customer interactions — chat, voice, and more.
* **Real-time events:** Webhooks ensure that call events (answered, missed, completed) flow into Lovi instantly, enabling automations and timely follow-ups.
* **Zero context-switching:** Your team stays in their familiar tools while Lovi handles the data orchestration behind the scenes.
**Connect your switchboard and let your calls work smarter! 📞**
Here you can fine-tune two key aspects:
#### A. Status Toggle 🔄
* **Active / Inactive:** Use the toggle to enable or disable the integration without deleting it. Handy if you need to pause the connection temporarily (e.g. during maintenance or testing) without losing your configuration.
#### B. Webhooks ➕
This is where the real power lives. Webhooks let RingOver notify Lovi in real time whenever something happens on your switchboard.
* **+ Add webhook:** Click this button to register a new webhook.
* **No webhooks configured?** You'll see a friendly message: *"No webhooks configured. Add one to connect your RingOver switchboard."*
Add as many webhooks as you need to cover different event types or switchboard configurations.
Once you've made your changes, click **Save configuration** to apply them.
***
### 🎯 Why connect RingOver?
The main goal is **visibility and automation**:
* **Unified call tracking:** Every call handled through RingOver is synchronised with Lovi, giving you a single pane of glass for all customer interactions — chat, voice, and more.
* **Real-time events:** Webhooks ensure that call events (answered, missed, completed) flow into Lovi instantly, enabling automations and timely follow-ups.
* **Zero context-switching:** Your team stays in their familiar tools while Lovi handles the data orchestration behind the scenes.
**Connect your switchboard and let your calls work smarter! 📞**