> ## Documentation Index
> Fetch the complete documentation index at: https://docs.lovi.ai/llms.txt
> Use this file to discover all available pages before exploring further.
# Create Template
> Create templates and campaigns through WhatsApp
 This is where you put on your creative hat.
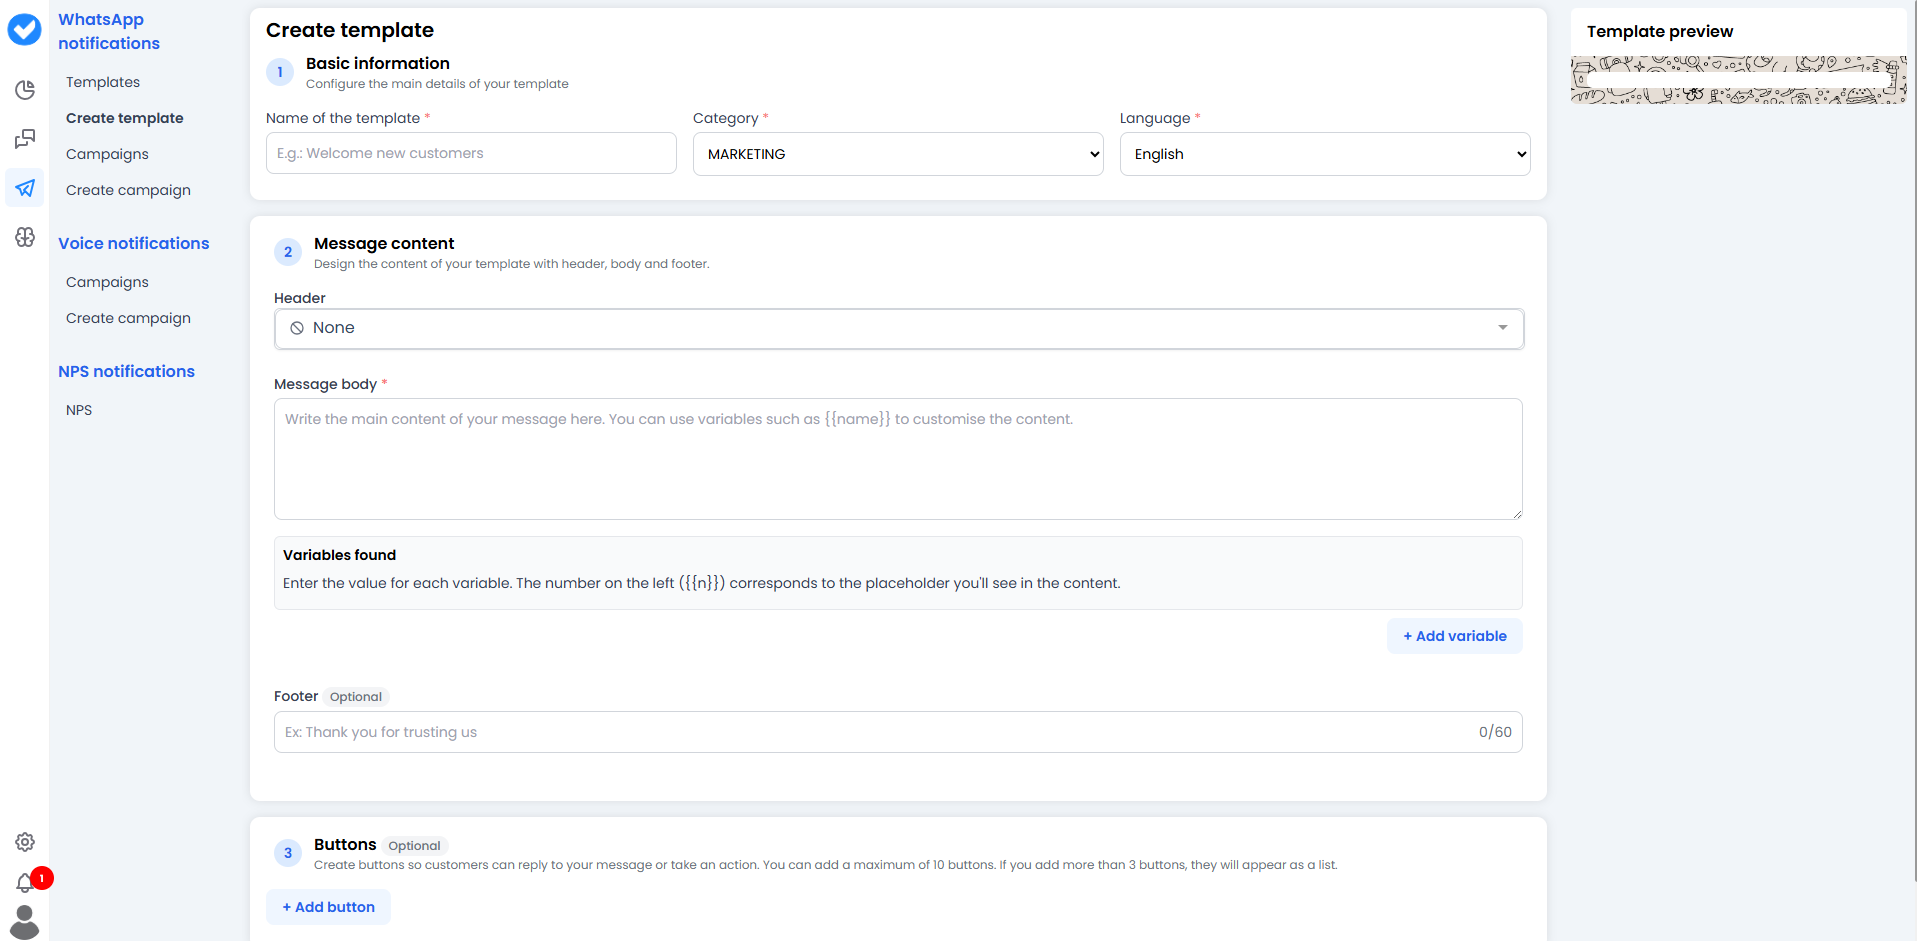
As we said before, you can’t greet a customer on WhatsApp without permission. You need a template. In this section, you’ll design that message, add some nice buttons, and send it to Meta so they can give us the **green light**. 👍
***
### Step 1: The Basics (Basic Information)
First, let’s identify what we’re about to create.
* **Name of the template:** Give it an internal name. Your customer won’t see it, but you will.
* *Bad:* `template_1_final_final_definitive`
* *Good:* `summer_promo_2024` or `payment_receipt`.
* **Category:** Meta is very strict here. Don’t lie!
* 📢 **Marketing:** If you’re selling something, offering discounts, or recovering abandoned carts.
* 🧾 **Utility:** If you’re sending a receipt, an order status update, or a security alert.
* **Language:** The language of the message.
***
### Step 2: The Content (Message Content) ✍️
This is where you put on your creative hat.
As we said before, you can’t greet a customer on WhatsApp without permission. You need a template. In this section, you’ll design that message, add some nice buttons, and send it to Meta so they can give us the **green light**. 👍
***
### Step 1: The Basics (Basic Information)
First, let’s identify what we’re about to create.
* **Name of the template:** Give it an internal name. Your customer won’t see it, but you will.
* *Bad:* `template_1_final_final_definitive`
* *Good:* `summer_promo_2024` or `payment_receipt`.
* **Category:** Meta is very strict here. Don’t lie!
* 📢 **Marketing:** If you’re selling something, offering discounts, or recovering abandoned carts.
* 🧾 **Utility:** If you’re sending a receipt, an order status update, or a security alert.
* **Language:** The language of the message.
***
### Step 2: The Content (Message Content) ✍️
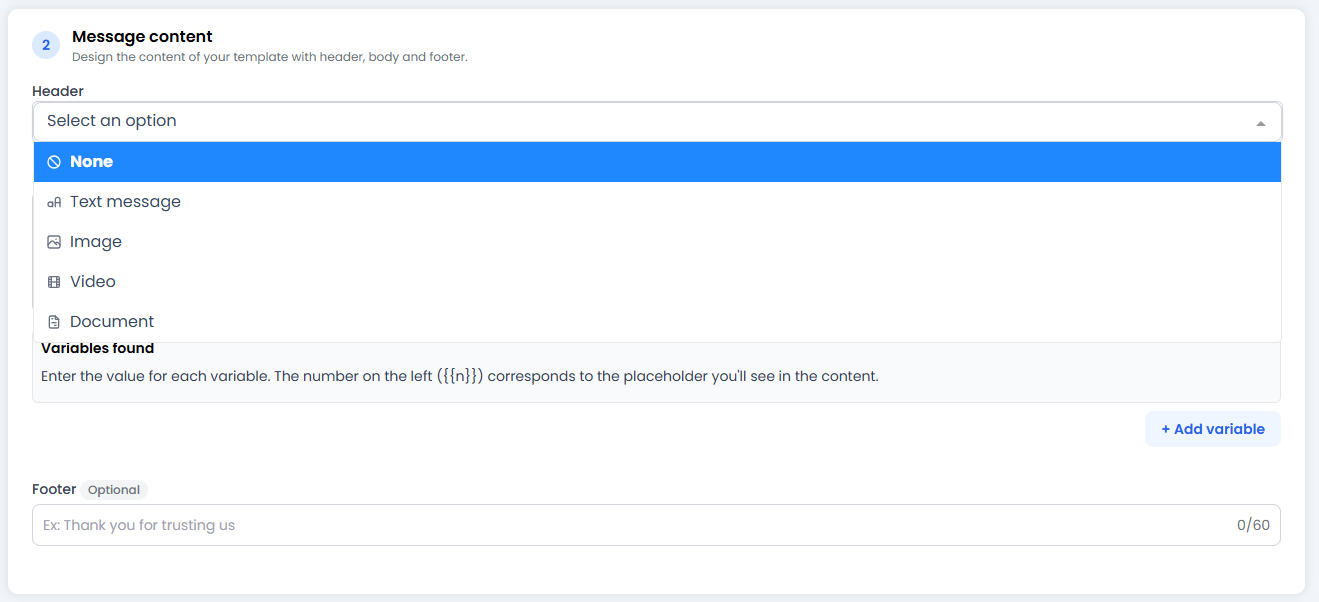 This is where you write the message. It has three parts:
#### A. Header (Optional – The Header)
The first thing the user sees. It can be:
* **Text:** A bold title.
* **Media:** An **Image** 📸 (highly recommended for Marketing), a **Video**, or a **Document** (ideal for sending invoice PDFs).
#### B. Message Body (The Body)
The main text. This is where we use the **magic of variables** ✨.
Don’t write “Hello John”. Write “Hello `{{name}}`”.
* Variables such as `{{1}}`, `{{name}}`, or `{{price}}` are placeholders that will be automatically filled with data from your database when the message is sent. That way, each customer feels like you’re speaking directly to them.
#### C. Footer (Optional – The Footer)
A small, grey text at the end. Use it for signatures or legal disclaimers.
* *e.g.:* “Sent by Lovi AI” or “Thank you for your trust”.
***
### Step 3: The Buttons 🔘
This is where you write the message. It has three parts:
#### A. Header (Optional – The Header)
The first thing the user sees. It can be:
* **Text:** A bold title.
* **Media:** An **Image** 📸 (highly recommended for Marketing), a **Video**, or a **Document** (ideal for sending invoice PDFs).
#### B. Message Body (The Body)
The main text. This is where we use the **magic of variables** ✨.
Don’t write “Hello John”. Write “Hello `{{name}}`”.
* Variables such as `{{1}}`, `{{name}}`, or `{{price}}` are placeholders that will be automatically filled with data from your database when the message is sent. That way, each customer feels like you’re speaking directly to them.
#### C. Footer (Optional – The Footer)
A small, grey text at the end. Use it for signatures or legal disclaimers.
* *e.g.:* “Sent by Lovi AI” or “Thank you for your trust”.
***
### Step 3: The Buttons 🔘
 **Pro tip:** A message with buttons converts three times more than a plain text message. Use them.
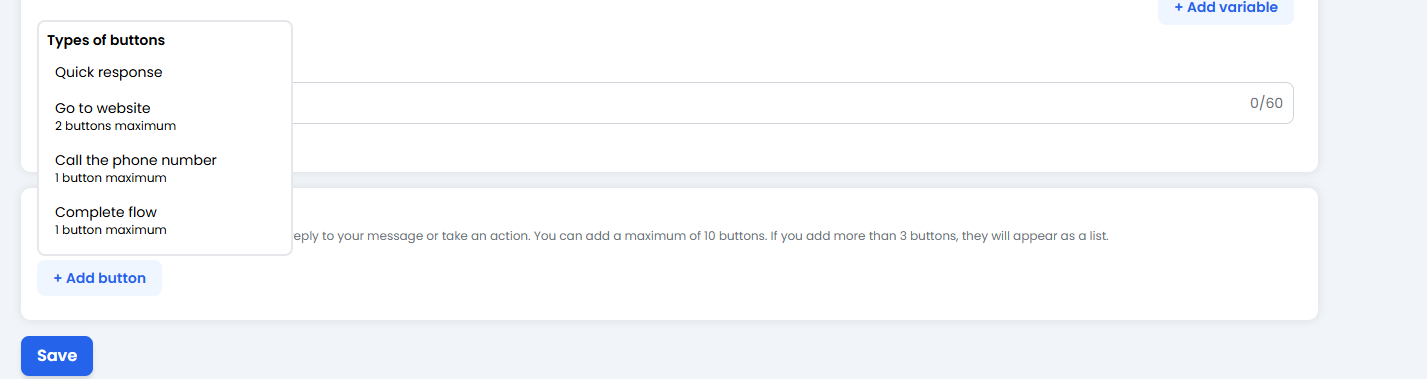
You can add up to **10 buttons**, but Meta has rules about the types:
1. **🚀 Quick Response:** Simple text (e.g. “Yes, I’m interested”, “No thanks”). The user taps and sends the response.
2. **🌐 Go to website:** Opens your website (maximum **2** buttons of this type).
3. **📞 Call phone number:** Opens the phone dialler so the user can call you (maximum **1** button).
4. **⚡ Complete flow:** For advanced use cases, such as opening a form inside WhatsApp (maximum **1** button).
> **The rule of 10:** You can mix button types, but the total number cannot exceed 10.
***
### 🚀 Send for Approval!
When you click **Save**:
1. Your template is saved in Lovi.
2. It is automatically sent to Meta’s servers.
3. We wait for the verdict. ⚖️
* If you respected the category and didn’t behave like a spammer, it will be approved within minutes (or a couple of hours).
* You’ll be able to see the status in the **Templates** tab (Module 13).
**Time to create! Make that first message count. 💬**
**Pro tip:** A message with buttons converts three times more than a plain text message. Use them.
You can add up to **10 buttons**, but Meta has rules about the types:
1. **🚀 Quick Response:** Simple text (e.g. “Yes, I’m interested”, “No thanks”). The user taps and sends the response.
2. **🌐 Go to website:** Opens your website (maximum **2** buttons of this type).
3. **📞 Call phone number:** Opens the phone dialler so the user can call you (maximum **1** button).
4. **⚡ Complete flow:** For advanced use cases, such as opening a form inside WhatsApp (maximum **1** button).
> **The rule of 10:** You can mix button types, but the total number cannot exceed 10.
***
### 🚀 Send for Approval!
When you click **Save**:
1. Your template is saved in Lovi.
2. It is automatically sent to Meta’s servers.
3. We wait for the verdict. ⚖️
* If you respected the category and didn’t behave like a spammer, it will be approved within minutes (or a couple of hours).
* You’ll be able to see the status in the **Templates** tab (Module 13).
**Time to create! Make that first message count. 💬**